Preparing your learning space...
100% through MySQL Workbench tutorials
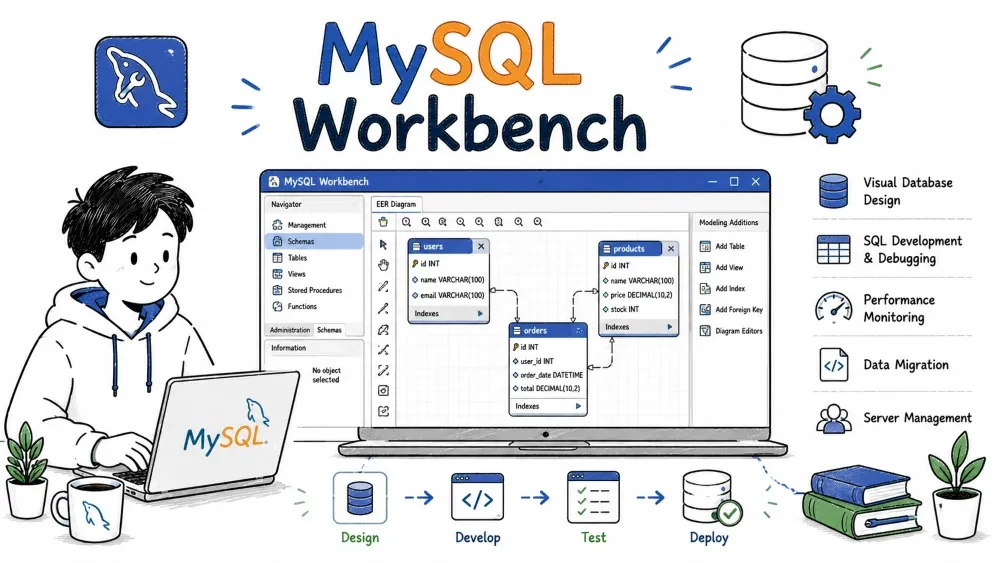
A practical guide to MySQL Workbench: connecting to databases, writing queries, designing schemas, managing servers, and importing/exporting data. No fluff — just what you need to use it.
MySQL Workbench is a graphical tool for working with MySQL databases. It replaces the command-line with visual editors for queries, schema design, and server management.
You get three main work areas: SQL development (write and run queries), data modeling (design databases visually), and server administration (users, backups, configs).
Available on Windows, macOS, and Linux. Download it from dev.mysql.com/downloads/workbench.
A connection stores the details needed to reach a MySQL server — host, port, user, password. You create one before doing anything else.
Local Dev, Production, etc.)127.0.0.1 for local server, or a remote IP3306root| Field | Example | Notes |
|---|---|---|
| Connection Name | My Local DB | Just a label |
| Hostname | 127.0.0.1 or localhost | IP or domain |
| Port | 3306 | Default MySQL port |
| Username | root | Or any MySQL user |
| Password | (saved or prompt) | Store only on trusted machines |
| Default Schema | mydb | Optional — pre-selects a database |
Once saved, the connection appears on the home screen as a tile. Double-click it to connect.
Troubleshooting: If "Test Connection" fails, check that the MySQL service is running (
sudo systemctl status mysqlon Linux, or check Services on Windows) and that the port isn't blocked by a firewall.
When you open a connection, the interface splits into several areas.
Right-click any item in the Navigator for quick actions: SELECT Rows, Copy to Clipboard, Drop Table, Alter Table, etc.
Where query tabs, model editors, and administration panels open. You can have multiple tabs open at once, like a browser.
Shows connection details: which user you're logged in as, which schema is active, and the server version.
Common actions: open SQL file, save, execute query, commit/rollback, create new connection, open model.
The SQL Editor is where you write and run queries. You get syntax highlighting, auto-complete, and query history.
Type your SQL in the editor tab. Some ways to execute:
| Action | What it does |
|---|---|
| Click the lightning bolt ⚡ | Runs all statements in the editor |
| Select text + click lightning bolt | Runs only the selected statements |
Ctrl + Shift + Enter | Runs all statements |
Ctrl + Enter | Runs the statement under the cursor |
Results appear in a grid below the editor. You can:
By default, INSERT, UPDATE, and DELETE run in auto-commit mode — changes are permanent immediately. To group changes into a transaction:
SET AUTOCOMMIT = 0;
-- or click the "Auto-Commit" toggle button in the toolbar

START TRANSACTION;
UPDATE accounts SET balance = balance - 100 WHERE id = 1;
UPDATE accounts SET balance = balance + 100 WHERE id = 2;
COMMIT;  -- or ROLLBACK to undo
The History tab in the output panel shows every query you've run in the session. Double-click one to re-run it. Use the search box to find past queries.
Use Ctrl + S to save the current editor content as a .sql file. Open one later with Ctrl + Shift + O.
Data modeling lets you design your database visually using Entity-Relationship (E-R) diagrams. You create tables, define columns, set relationships, and forward-engineer the design into actual SQL.
From the home screen, click Create New EER Model. You get a tab with:
T).Columns tab:
| Column | Datatype | PK | NN | UQ | AI | Default |
|---|---|---|---|---|---|---|
| id | INT | ☑ | ☑ | ☐ | ☑ | |
| name | VARCHAR(100) | ☐ | ☑ | ☐ | ☐ | |
| VARCHAR(255) | ☐ | ☑ | ☑ | ☐ | ||
| created_at | TIMESTAMP | ☐ | ☐ | ☐ | ☐ | CURRENT_TIMESTAMP |
Use the relationship toolbar or press:
| Key | Creates |
|---|---|
1 | 1:1 (one-to-one) non-identifying |
2 | 1:n (one-to-many) non-identifying |
3 | 1:n identifying |
4 | m:n (many-to-many) — creates a junction table |
Click the relationship tool, then click the parent table first, then the child table. A line appears between them. Double-click the line to edit foreign key options:
Turns your model into real database tables:
Ctrl + G)The SQL is shown before execution — you can save it as a file instead of running it.
Creates a model from an existing database:
Ctrl + L)If you change the model after the database already exists, use Database → Synchronize Model to update the real database to match the model (or vice versa). It shows a diff and lets you pick what to apply.
These tools live under the Management section in the Navigator panel.
Shows at a glance:
A button to start or stop the MySQL server. Handy on Windows where you'd otherwise use the Services panel.
Manage database users without writing GRANT statements.
ALL — full access to that schemaSELECT, INSERT, UPDATE, DELETE — read/write but no schema changesSELECT ONLY — read-onlyShows all SHOW VARIABLES in a searchable table. Useful for checking:
max_connections — how many simultaneous connections allowedinnodb_buffer_pool_size — memory allocated to InnoDBwait_timeout — seconds before idle connections are droppedView error log, general query log, and slow query log from the interface. For the slow query log, you can set a threshold (e.g., 2 seconds) to find poorly performing queries.
A text editor for my.cnf / my.ini with a visual form. Change settings like:
utf8mb4 recommended)Changes take effect after a server restart.
.sql file (portable, good for backups)CREATE DATABASE IF NOT EXISTS at the topDROP TABLE IF EXISTS before each CREATE TABLEINSERT statements.sql file or the dump folderDefault Schema: If your dump file includes
CREATE DATABASE, leave "Default Schema" blank. If not, select the target database first.
| Shortcut | Action |
|---|---|
Ctrl + Enter | Execute current statement |
Ctrl + Shift + Enter | Execute all statements |
Ctrl + Alt + Enter | Execute selected statements |
Ctrl + Shift + F9 | Toggle auto-commit |
| Shortcut | Action |
|---|---|
Ctrl + Space | Auto-complete |
Ctrl + / | Toggle comment (line) |
Ctrl + Shift + / | Toggle comment (block) |
Ctrl + Shift + U | Convert selection to uppercase |
Ctrl + Shift + L | Convert selection to lowercase |
Ctrl + D | Duplicate line |
Ctrl + L | Delete line |
| Shortcut | Action |
|---|---|
Ctrl + B | Toggle Navigator panel |
Ctrl + \ | Toggle Output panel |
Ctrl + F6 | Switch to next tab |
Ctrl + Shift + F6 | Switch to previous tab |
Ctrl + T | New query tab |
Ctrl + W | Close current tab |
F6 | Open EER Diagram from model |
| Shortcut | Action |
|---|---|
Ctrl + B | Beautify / format SQL query |
| Shortcut | Action |
|---|---|
Ctrl + F | Find in editor |
Ctrl + H | Find and replace |
Ctrl + Shift + F | Find in all open editors |
Most shortcuts can be customized in Edit → Preferences → Keyboard Shortcuts.
Open preferences via Edit → Preferences (Windows/Linux) or MySQL Workbench → Preferences (macOS).
UPDATE/DELETE without a WHERE clause that uses a key. Prevents accidental mass updates. Disable it if you truly intend to update all rows.Lists every shortcut in a searchable table. Click a row then press a new key combination to rebind it.
INT or VARCHAR(45))table_id, Workbench can auto-detect it as a foreign keyWhen you modify a table structure (add/remove columns, change types) in the table editor, Workbench generates an ALTER TABLE script. Review it before applying — the "Review SQL" dialog shows exactly what will run. If Workbench needs to drop and recreate the table (which can happen with some column type changes), you'll see a warning.
Run a query, then click the Explain button (or press Ctrl + I). The execution plan shows how MySQL processes the query:
ALL in the type column = full table scan (bad, needs an index)Using temporary in Extra = temp table created for sorting (consider optimizing)Using filesort = sorting without using an indexIn the SQL Editor, right-click → Build WHERE Clause gives you a visual filter builder. Pick columns, operators, and values — it generates the WHERE clause for you. Good for complex conditions.
You can have multiple connections open in different tabs. Each tab is independent. Use the connection color (set when editing the connection) to visually distinguish production (red) from development (green) connections at a glance.
Right-click in the editor → Snippets → Insert a template:
SELECT — basic selectINSERT — insert templateCREATE TABLE — create table templateRight-click a table in the Navigator → Table Inspector → Info tab gives you a dashboard:
Drag a table from the Navigator into the SQL Editor — it inserts the table name. Drag it while holding Shift — it inserts SELECT * FROM table. Drag it into an EER Diagram canvas — it reverse-engineers that table into the model.
Database → Synchronize Model can also compare two schemas:
Useful for checking that development, staging, and production are in sync.
Workbench doesn't have built-in scheduler, but you can:
Right-click a connection → Add to Favorites. Favorites appear at the top of the connection list. You can also tag connections with custom colors for quick identification.
If you drag panels around and lose something, go to View → Restore Default View. It resets all panels to their original positions without affecting your connections or saved files.
Save your progress and earn XP for completing tutorials.
Keep learning
Technology
MySQL
Lesson group
MySQL Workbench
Progress
100% complete

