Preparing your learning space...
25% through CISCO Packet Tracer tutorials
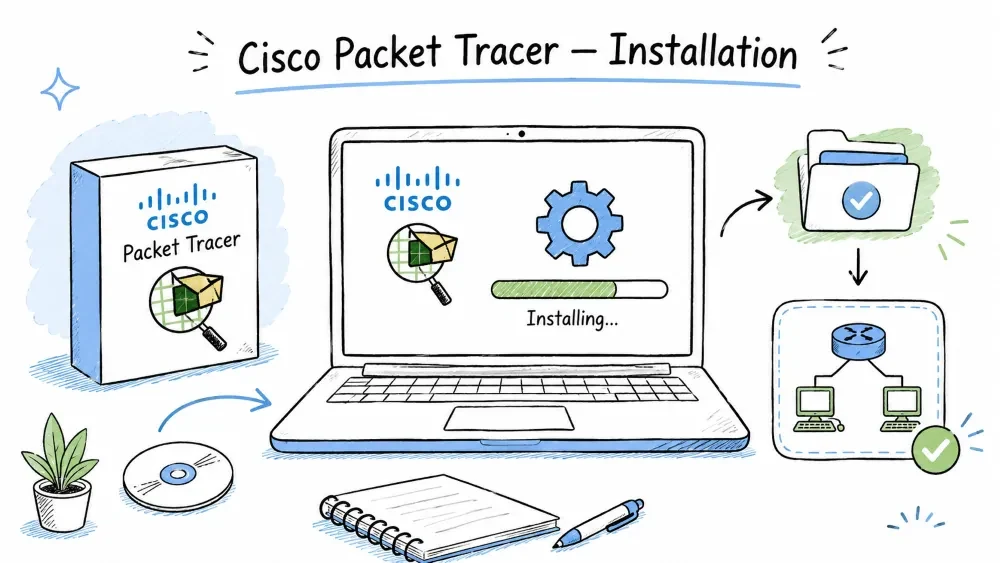
Objective: Install Cisco Packet Tracer, understand the interface, and create your first network.
Cisco Packet Tracer is a network simulation and visualization tool developed by Cisco Systems for teaching and learning networking concepts. It allows students and professionals to design, configure, and troubleshoot complex networks without requiring physical hardware.
Cisco Packet Tracer is a powerful educational tool that provides a virtual environment where you can:
Packet Tracer is widely used in Cisco Networking Academy courses and is an essential tool for CCNA certification preparation. It bridges the gap between theoretical learning and real-world hands-on practice.
| Benefit | Description |
|---|---|
| Cost-Free | No need to purchase expensive hardware for learning |
| Safe Environment | Mistakes don't damage real equipment |
| Scalable | Build networks from 2 devices to hundreds |
| Visual Learning | See packets move, cables connect, and LEDs change |
| Activity Wizard | Create and grade custom lab exercises |
Installation is the process of downloading, setting up, and configuring Cisco Packet Tracer on your computer so you can begin building and simulating networks. This section covers system requirements, account creation, download, installation steps, and troubleshooting.
System requirements are the minimum and recommended hardware and software specifications your computer must meet to run Cisco Packet Tracer smoothly. Meeting the recommended requirements ensures better performance, especially with complex network topologies.
| Component | Minimum | Recommended |
|---|---|---|
| Operating System | Windows 8.1, Ubuntu 18.04, macOS 10.13 | Windows 10/11, Ubuntu 20.04+, macOS 11+ |
| RAM | 4 GB | 8 GB+ |
| Processor (CPU) | Intel Core i3 / AMD equivalent | Intel Core i5+ or AMD Ryzen 5+ |
| Storage Space | 1 GB free | 2 GB free |
| Screen Resolution | 1024×768 | 1920×1080 (Full HD) |
| Internet | Required for download and login | Broadband connection |
Note: Packet Tracer does not require a powerful graphics card. It runs on integrated graphics without issues. However, larger topologies (50+ devices) benefit from more RAM.
These are the step-by-step instructions to go from having nothing to running Cisco Packet Tracer on your machine. The process involves creating a Cisco Networking Academy account, downloading the installer, running it, and logging in.
Create a Cisco Networking Academy Account
Download Packet Tracer
Install the Software
On Windows:
.exe installerOn macOS:
.dmg fileOn Linux (Ubuntu/Debian):
sudo dpkg -i PacketTracer_*.deb
If dependency errors appear, run:
sudo apt-get install -f
Launch and Login
| Problem | Likely Cause | Solution |
|---|---|---|
| Installer won't run | Corrupted download | Re-download the installer |
| Linux dependency errors | Missing libraries | Run sudo apt-get install -f |
| Login fails | Wrong credentials | Reset password on NetAcad |
| Blank screen on launch | Graphics driver issue | Update graphics drivers |
| App crashes on startup | Java version conflict | Install latest Java runtime |
The Packet Tracer Interface is the graphical user environment where you build, configure, and simulate networks. Understanding the layout of the interface — including the menu bar, toolbar, workspace, and device panels — is essential for using the tool effectively.
When you open Packet Tracer for the first time, you'll see a window divided into several logical areas. Each area serves a specific purpose in the network design workflow.
 ┌──────────────────────────────────────────────────────────────┐
 │  Menu Bar         [File] [Edit] [Options] [Extensions] [Help] │
 ├──────────────────────────────────────────────────────────────┤
 │  Main Toolbar     [Select] [Move] [Copy] [Paste] [Undo][Redo] │
 ├──────────────────────────────────────────────────────────────┤
 │  [Logical] [Physical]                                        │
 ├──────────────────────────────────────────────────────────────┤
 │                                                              │
 │                    Workspace (Main Canvas)                   │
 │         This is where you drag devices, draw cables,         │
 │         and build your network topology.                     │
 │                                                              │
 │                                                              │
 ├──────────────────────────────────────────────────────────────┤
 │  Device-Type Panel     │     Device-Specific Panel           │
 │  [Network Devices]     │     [Router 1841]                   │
 │  [End Devices]         │     [Switch 2960]                   │
 │  [Connections]         │     [Copper Cable]                  │
 │  [Wireless Devices]    │     [Access Point]                  │
 └──────────────────────────────────────────────────────────────┘
Key areas are the distinct functional zones of the Packet Tracer window. Each area has a specific role in helping you design, configure, and manage your network. Understanding these areas allows you to work efficiently.
| Area | Purpose | How to Use It |
|---|---|---|
| Menu Bar | Contains all file, edit, options, and help menus | Use File → Save to save your work, Options → Preferences to customize |
| Main Toolbar | Quick-access buttons for common actions | Click the Select icon to pick devices, the Note icon (T) to add labels |
| Logical/Physical Tabs | Switch between logical topology view and physical rack view | Logical for diagrams, Physical for placing devices in racks/cities |
| Workspace (Canvas) | The main area where you build your network | Drag devices here, connect them with cables, view real-time activity |
| Device-Type Panel | Categories of devices you can add to your network | Click a category to see available models in the adjacent panel |
| Device-Specific Panel | Specific models or cable types within the selected category | Drag a specific model onto the workspace |
Packet Tracer offers two distinct views for working with networks. The Logical view is the default workspace where you design network topologies as diagrams. The Physical view shows how equipment would be physically arranged in racks, wiring closets, or even across geographic locations.
Device types are the categories of network equipment you can place on the workspace. Each type serves a different role in a network — from end-user devices like PCs to infrastructure devices like routers and switches. Choosing the right device type is the first step in building any network.
| Category | Examples | Purpose |
|---|---|---|
| Routers | 1841, 2901, 4321, 1941 | Route traffic between different networks (Layer 3) |
| Switches | 2960, 3560, 3650, 3850 | Connect devices within the same network (Layer 2 / Layer 3) |
| Hubs | Hub-PT | Legacy device; repeats signals to all ports (obsolete but useful for learning) |
| Wireless Devices | Access Point, Wireless Router | Provide wireless network connectivity |
| End Devices | PC, Laptop, Server, Printer, IP Phone | Source and destination of network traffic |
| WAN Emulation | Cloud, DSL Modem, Cable Modem | Simulate WAN connections to the internet or remote sites |
| Connections | Copper Straight, Copper Cross-Over, Fiber, Serial, Console, Coaxial | Physical cables that connect devices |
Connection cables are the physical media used to link network devices together. Each cable type is designed for specific scenarios — using the wrong cable can prevent devices from communicating. Packet Tracer automatically suggests the correct cable in most cases.
| Cable Type | Used Between | Notes |
|---|---|---|
| Copper Straight-Through | PC ↔ Switch, Switch ↔ Router | Most common cable in modern networks |
| Copper Cross-Over | PC ↔ PC, Switch ↔ Switch, Router ↔ Router | Used for same-device-type connections |
| Console | PC ↔ Router/Switch (for initial config) | RS-232 serial connection for CLI access |
| Serial DCE/DTE | Router ↔ Router (WAN links) | Requires clock rate on DCE side |
| Fiber | Long-distance or high-speed links | Supports longer distances than copper |
| Phone/Coaxial | Modem ↔ ISP connection | Legacy/ISP connections |
Important: In modern networks, many devices support Auto-MDIX which automatically detects and corrects cable type, but in Packet Tracer you should still choose the correct cable.
A network is a collection of interconnected devices (computers, servers, printers, routers, switches) that can communicate and share resources with each other. Networks are the foundation of modern communication — from a small home network with two computers to the global internet connecting billions of devices.
An IP (Internet Protocol) address is a unique numerical identifier assigned to each device on a network. It works like a mailing address — it tells the network where a device is located so data can be delivered correctly. Without an IP address, a device cannot communicate on a network.
192.168.1.1)2001:db8::1)A subnet mask is a 32-bit number that separates an IP address into two parts: the network portion (which identifies the network) and the host portion (which identifies the specific device on that network). It tells devices whether another device is on the same local network or a different network.
255.255.255.0 means the first three octets identify the network, the last octet identifies the host192.168.1.1 with mask 255.255.255.0 → Network 192.168.1.0, Host .1A default gateway is the IP address of the router that a device uses to send traffic to destinations outside its own network. When a device needs to communicate with another device on a different network, it forwards the traffic to the default gateway, which then routes it to the destination.
192.168.1.1 or 192.168.0.1)A switch is a networking device that connects multiple devices within the same local area network (LAN). It operates at Layer 2 of the OSI model and forwards data based on MAC addresses. Unlike a hub (which blindly repeats data to all ports), a switch intelligently sends data only to the specific device that needs it.
Ping is a network utility used to test whether a device is reachable on a network. It sends ICMP (Internet Control Message Protocol) Echo Request packets to a target IP address and waits for an Echo Reply. Ping measures round-trip time and packet loss, making it the most basic and essential network troubleshooting tool.
C:\> ping 192.168.1.2
Reply from 192.168.1.2: bytes=32 time=1ms TTL=128
Creating a network in Packet Tracer involves placing devices on the workspace, connecting them with the appropriate cables, and configuring their IP addresses so they can communicate. In this section, we will build a simple Local Area Network (LAN) with two PCs connected through a switch.
A network topology is the arrangement of devices and connections in a network. It is the "map" of your network. The simplest topology is a star topology where all end devices connect to a central switch.
We'll build a simple LAN: PC → Switch → PC
   ┌──────┐        ┌──────────┐        ┌──────┐
   │ PC-0 │────────│ Switch   │────────│ PC-1 │
   │ .1   │  Fa0/1 │  2960    │  Fa0/2 │ .2   │
   └──────┘        └──────────┘        └──────┘
       192.168.1.0/24
Adding devices is the process of dragging network components from the device-type panel onto the workspace. This is the first physical step in building any network topology.
Pro Tip: You can rename a device by clicking on its displayed name and typing a new one. For example, rename "PC0" to "PC-A" for clarity.
Connecting devices means selecting the correct cable type and physically linking the devices' interfaces. The cable must match the port types on both ends. Packet Tracer will typically select the correct cable type when you choose the "Automatically Choose Connection Type" option.
Visual Cue: When connected, you'll see a green dot on the switch ports and a solid or blinking green line between the devices. If the link is red, the connection failed — check cable type or port status.
Configuring an IP address assigns a unique network identity to a device so it can communicate on the network. Each device on the same network must have a unique IP address within the same subnet range. Without correct IP configuration, devices cannot send or receive data.
On PC-0:
192.168.1.1255.255.255.0192.168.1.254 (this would be a router's IP — we leave it for now)On PC-1:
192.168.1.2255.255.255.0192.168.1.254Important: Both PCs must use the same subnet mask (
255.255.255.0) and the same network portion of the IP address (192.168.1.x) to communicate. If PC-0 had IP192.168.1.1and PC-1 had IP10.0.0.2, they would NOT be able to communicate without a router between them.
Testing connectivity verifies that the network is functioning correctly and devices can communicate. The ping command sends test packets and listens for replies. A successful ping confirms that the entire network path — cables, switch, and IP configuration — is working correctly.
ping 192.168.1.2
Expected Successful Output:
Pinging 192.168.1.2 with 32 bytes of data:

Reply from 192.168.1.2: bytes=32 time<1ms TTL=128
Reply from 192.168.1.2: bytes=32 time<1ms TTL=128
Reply from 192.168.1.2: bytes=32 time<1ms TTL=128
Reply from 192.168.1.2: bytes=32 time<1ms TTL=128

Ping statistics for 192.168.1.2:
    Packets: Sent = 4, Received = 4, Lost = 0 (0% loss),
Approximate round trip times in milli-seconds:
    Minimum = 0ms, Maximum = 0ms, Average = 0ms
🎉 Congratulations! Your first network is working! PC-0 and PC-1 can communicate through the switch.
Understanding ping errors helps you diagnose network problems quickly. Each error message tells you something specific about what is broken in the network path.
| Error Message | Meaning | Likely Cause |
|---|---|---|
Request timed out. | No reply received | Wrong IP, wrong subnet, cable issue, firewall |
Destination Host Unreachable | No route to destination | Wrong default gateway or subnet mask |
TTL expired in transit | Packet crossed too many routers | Routing loop or too many hops |
Reply from <IP>: Destination unreachable | Router sent back an error | No route to destination on an intermediate router |
Saving your work in Packet Tracer creates a .pkt file that preserves all devices, configurations, cables, and the current state of your network. This allows you to close Packet Tracer and resume your work later exactly where you left off.
File → Save (or press Ctrl + S).pkt — this is the native Packet Tracer file formatOptions → PreferencesFile → Open (or Ctrl + O).pkt file and select it.pkt file in Windows Explorer to open itFile → Export → Export as PNG/JPEG — useful for reportsFile → Export → Export as PDF — for documentation purposesShortcuts and tips help you work faster in Packet Tracer by reducing repetitive mouse actions. Learning these will significantly speed up your network design workflow.
| Action | Shortcut | Description |
|---|---|---|
| Select/Move | Ctrl + Click or press V | Select and move devices on the canvas |
| Delete Device | Select device → Delete or Backspace | Remove a device from the topology |
| Zoom In | Ctrl + Scroll Up or press + | Get a closer view of detailed areas |
| Zoom Out | Ctrl + Scroll Down or press - | See more of the topology at once |
| Copy Selected | Ctrl + C | Copy selected device(s) to clipboard |
| Paste | Ctrl + V | Paste copied device(s) onto the canvas |
| Undo | Ctrl + Z | Undo the last action |
| Redo | Ctrl + Y | Redo the last undone action |
| Select All | Ctrl + A | Select all devices on the workspace |
| Add Note | Press T or click Note icon | Add a text label to the canvas |
Ctrl + G to group them into a cluster — this reduces visual clutter in large topologiesView → Grid) to align devices neatlyThis lab exercise challenges you to expand the simple two-PC network into a four-PC network. This reinforces the concepts of device placement, cabling, IP addressing, and connectivity testing.
Goal: Add PC-2 and PC-3 to the same switch and verify all four PCs can communicate.
Instructions:
| PC | IP Address | Subnet Mask |
|---|---|---|
| PC-0 | 192.168.1.1 | 255.255.255.0 |
| PC-1 | 192.168.1.2 | 255.255.255.0 |
| PC-2 | 192.168.1.3 | 255.255.255.0 |
| PC-3 | 192.168.1.4 | 255.255.255.0 |
| Test | Command | Expected Result |
|---|---|---|
| PC-0 → PC-1 | ping 192.168.1.2 | ✅ 4 Replies |
| PC-0 → PC-2 | ping 192.168.1.3 | ✅ 4 Replies |
| PC-2 → PC-3 | ping 192.168.1.4 | ✅ 4 Replies |
| PC-3 → PC-0 | ping 192.168.1.1 | ✅ 4 Replies |
Hint: If any ping fails, check: (1) Cables are connected to the correct ports, (2) All cable link lights are green, (3) All IPs are on the same
192.168.1.xnetwork, (4) All subnet masks are255.255.255.0
Simulation Mode is a powerful Packet Tracer feature that lets you see packets move step-by-step through the network. Instead of just seeing the final result (ping replies), you can watch each packet travel from the source, through the switch, to the destination — frame by frame. This is extremely valuable for understanding how network communication actually works.
ping 192.168.1.2Learning Point: Simulation Mode reveals that ping actually involves two protocols — ARP (to resolve MAC addresses) and ICMP (the actual ping). This is invisible in Realtime Mode.
Save your progress and earn XP for completing tutorials.
Technology
Cyber Security & Networking
Lesson group
CISCO Packet Tracer
Progress
25% complete

